Hosting a Minecraft server can be expensive for casual players. Free services like Athernos are laggy at times. Moreover, the saved files might get lost on the server entirely. All the painstaking effort to the world has gone in vain. Hence, it is imperative for us to self-host the server ourselves.
Requirements
For everything to work, there are a couple of software and tools that must be installed before hand.
Java
The first and the most crucial component to be installed is Java.
Usually, Java is installed along with the Minecraft Launcher as Minecraft Java Edition is dependent on, of course, Java. Verify that Java is installed by typing java --version in the command prompt and it should result as the following output.
java 17.0.1 2021-10-19 LTS
Java(TM) SE Runtime Environment (build 17.0.1+12-LTS-39)
Java HotSpot(TM) 64-Bit Server VM (build 17.0.1+12-LTS-39, mixed mode, sharing)Minecraft Server
The second item on the list is the Minecraft server. Go to the official download page and download the required file from the download link that reads "Download minecraft_server.x.x.x.jar".
The x.x.x represents the version of Minecraft for the server. Find the best version that suits you. After that, rename the JAR file to server.jar.
ngrok
ngrok allows us to create tunnel to the public so that our friends can join our locally hosted Minecraft server quickly and for free.
Proceed to sign up for a free ngrok account and download the ngrok client from the dashboard. There should be a banner that contains links for the ngrok downloader for various OS. Download the version that is suitable for your operating system and extract the ngrok.exe file from the zip file to anywhere in your computer.
ngrok is no longer "free" It seems like ngrok has reviewed their pricing plan and the free plan is no longer sustainable. The 1GB data transfer allotted will be exhausted in merely two days (or less).

Setting up Server Directory
Next, create an empty directory anywhere on your computer that will serve as the folder that contains everything the Minecraft server as well as the Minecraft save files. Copy/move the server.jar file and the extracted ngrok.exe to the current directory.
Create a batch file named run.bat on the same directory and open it with any text editor. Fill in the following contents that will spin up the server when executed.
java -Xmx1024M -Xms1024M -jar server.jar nogui
PAUSE
The number 1024 indicates the RAM in Megabytes that the server is allocated from your computer. If you plan to give the server 2GB of RAM instead, simply multiply 1024 by 2 and replace the numbers.
Caution: Running a server is quite resource intensive and hence you will need to make sure you have enough RAM and a decent CPU/GPU before hosting one. If not, it certainly will impact the overall gaming experience with unbearable lags.
The server directory will now look like this, with 3 files inside it.
├─ ngrok.exe
├─ run.bat
└─ server.jarHost Locally
Execute run.bat
Next, execute the run.bat file by double clicking on it. During first execution, the script will exit with a log saying that it failed to load the eula.txt. This is expected and will get back to that in a bit.
Now, new files and folders are generated. The content should match the directory structure displayed below.
├─ libraries/
│  └─ ...
├─ logs/
│  └─ ...
├─ versions/
│  └─ ...
├─ eula.txt
├─ ngrok.exe
├─ run.bat
├─ server.jar
└─ server.propertiesAgree to EULA
Open up eula.txt and search for a property named eula and change its value from false to true. The contents should be similar to what is shown below.
#By changing the setting below to TRUE you are indicating your agreement to our EULA (https://aka.ms/MinecraftEULA).
#Mon Feb 06 10:57:19 MYT 2023
eula=true
Save the file and close.
Execute run.bat Second Time
After the change is saved, run run.bat again and this time the server should be up and running while generating a brand new world with a few more files within the directory as shown.
├─ libraries/
│  └─ ...
├─ logs/
│  └─ ...
├─ versions/
│  └─ ...
├─ world/
│  └─ ...
├─ banned-ips.json
├─ banned-players.json
├─ eula.txt
├─ ngrok.exe
├─ ops.json
├─ run.bat
├─ server.jar
├─ server.properties
├─ usercache.json
└─ whitelist.json
If the Minecraft server has been successfully started, it should display the port that it is running on. Usually is will be 25565.
[11:01:11] [Server thread/INFO]: Starting Minecraft server on *:25565To enable cracked versions of Minecraft client to join the server, we will need to disable the authentication by disabling the
online-modein theserver.propertiesfile.
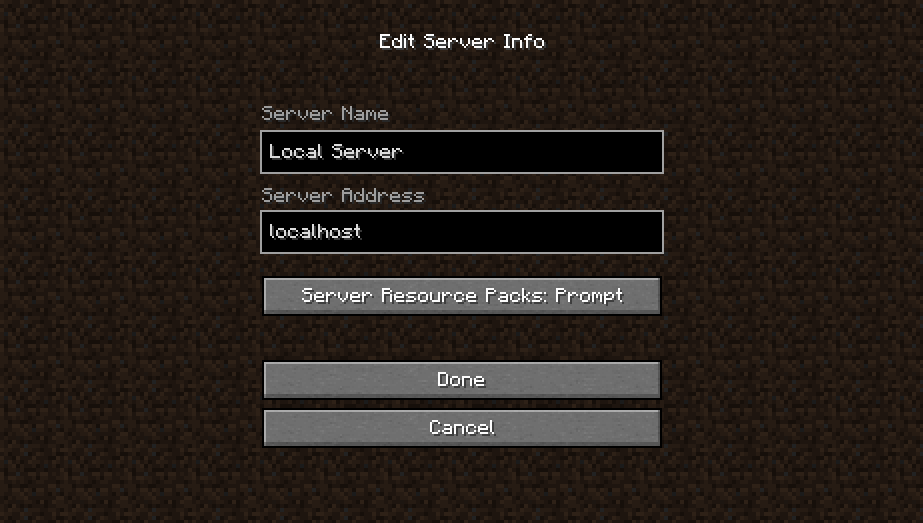
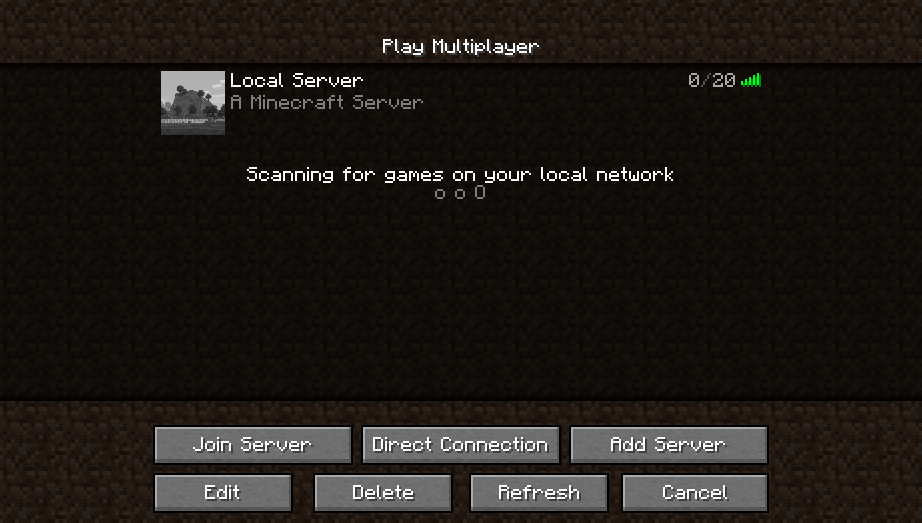
Now, the server can be joined with localhost as its address.
To stop the server, type stop to the server command prompt and it will save all the data and exit safely. Make sure to do this every time when shutting down the server or else any progress that's made on the session will be lost.
Here are some sample logs when shutting down the server.
[14:17:39] [Server thread/INFO]: Done (2.857s)! For help, type "help"
stop
[14:17:45] [Server thread/INFO]: Stopping the server
[14:17:45] [Server thread/INFO]: Stopping server
[14:17:45] [Server thread/INFO]: Saving players
[14:17:45] [Server thread/INFO]: Saving worlds
[14:17:46] [Server thread/INFO]: Saving chunks for level 'ServerLevel[world]'/minecraft:overworld
[14:17:47] [Server thread/INFO]: Saving chunks for level 'ServerLevel[world]'/minecraft:the_end
[14:17:47] [Server thread/INFO]: Saving chunks for level 'ServerLevel[world]'/minecraft:the_nether
[14:17:47] [Server thread/INFO]: ThreadedAnvilChunkStorage (world): All chunks are saved
[14:17:47] [Server thread/INFO]: ThreadedAnvilChunkStorage (DIM1): All chunks are saved
[14:17:47] [Server thread/INFO]: ThreadedAnvilChunkStorage (DIM-1): All chunks are saved
[14:17:47] [Server thread/INFO]: ThreadedAnvilChunkStorage: All dimensions are savedExpose Server to Public
Next, add the ngrok authentication token to the ngrok installed in the server directory. There should be a command to connect your ngrok account on the dashboard after signed in as shown below.
ngrok config add-authtoken <your-token-here>Create a file named run-ngrok.bat with the following command.
ngrok tcp --region us 25565
PAUSE
The command expose the port 25565 which is the local Minecraft server run on with the designated region for routing. Choose one that is closest to your geographical location. Here is the list of available regions for reference.
Save the changes and exit the file. Execute it by double click on and it should now expose your local Minecraft server to the public. The output below shows the ngrok is up and running.
ngrok
Add Okta or Azure to protect your ngrok dashboard with SSO: https://ngrok.com/dashSSO
Session Status online
Account <your-username> (Plan: Free)
Version 3.1.1
Region United States (us)
Latency 23ms
Web Interface http://127.0.0.1:4040
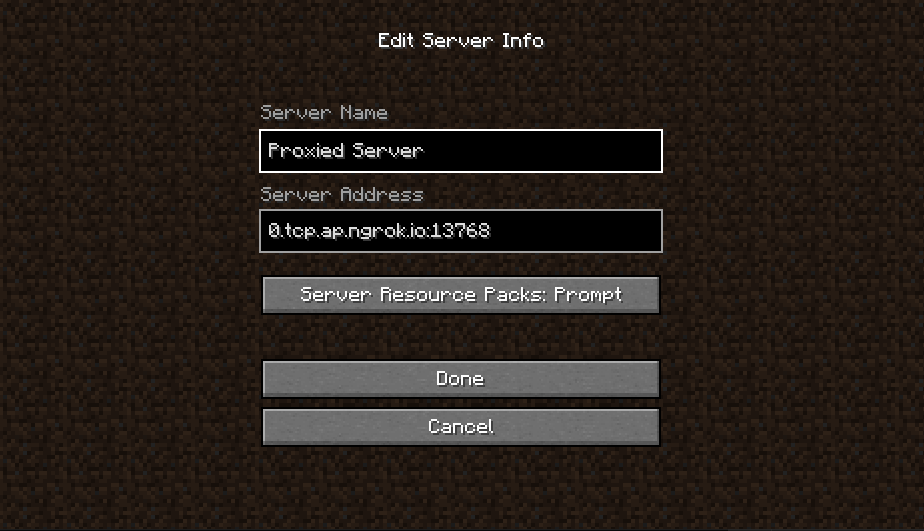
Forwarding tcp://0.tcp.ap.ngrok.io:13768 -> localhost:25565
Connections ttl opn rt1 rt5 p50 p90
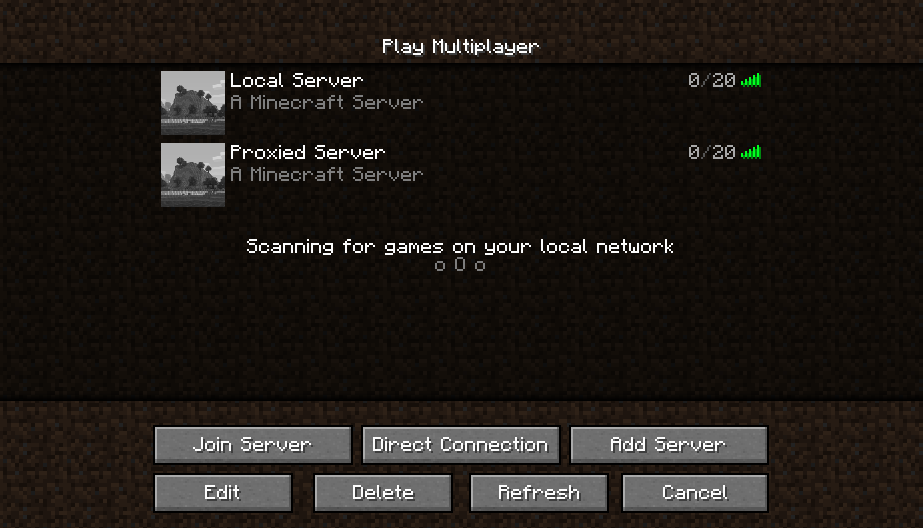
0 0 0.00 0.00 0.00 0.00Copy the TCP URL in the Forwarding property and give it to your friends to join the adventure. Take note that the port will change every time when opening a new session and will need to update whoever that will be joining that particular session.
Whitelisting
Since the server is publicly available to the entire internet, malevolent actors is capable to detect the open channel and join the world to cause harm.
To do that, go to server.properties file and look for a field named white-list and set its value to true. After that, to whitelist a player, go to the running server command prompt and type the following to whitelist a player.
whitelist add <player-name>A player that is not in the whitelist will be kicked immediately upon joining.
Closing
This article walks through how to set up a self-hosted server and made it accessible to the public via ngrok. It is important to set a whitelist to prevent any unsolicited intruder from entering the server.